
By John C. Rucker (Page 2 of 8)
As mentioned earlier, an older PC will work just fine for our project. Of course if you have, or want to buy, a fancy new server, that's great, too. At minimum, you'll need to have 64MB of RAM for the installer to work. There are plenty of anecdotes online of people running the desktop version of Ubuntu on machines as slow as a 166MHz Pentium, so the server version (which has no graphical system) should run fine on such a system. The 800MHz machines we use perform great. To be safe, try to have a hard drive of at least a gigabyte or two, though the server installation is very small and you probably won't need that much space. Bottom line: any PC 5-years-old or newer should be just fine.
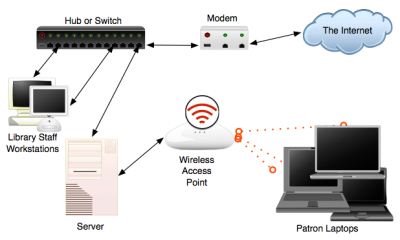
Simple Network Diagram
Although it certainly helps, you don't even need high-speed Internet access if you just want to use this setup as a web filter, and not offer patron laptop access. If that's your goal, you'll just need one network interface card.
For the rest of this tutorial, though, we'll assume that
you are offering public wireless access, and will
therefore have two network cards: one going towards your
Internet
connection, and the other feeding your public network.
This is the most basic setup, as shown in the network
diagram.
Before you install your second network card, make a
note of its
MAC
address, we'll need it later in this tutorial. The
MAC address should be on the outside of the box your
network card came in, or on the card itself. It will
be a string of letters and numbers similar to this:
00:02:B3:3C:75:91, possibly written without
the colons.
For the access point itself, you don't need anything fancy to do the job, especially for a smaller library. And the "dumber" the access point the better. We don't need any built-in routers or firewalls—our server will handle all of that sort of thing. Models like the Linksys WAP54G, the Netgear WG602, or the 3Com OfficeConnect 11g, among many others, will all work fine.
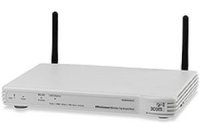
A Wireless Access Point
We'll start by setting up the access point. First, you'll need to give your network a name. It likely is set by default to something like "Linksys" or "MS-HOME", depending on the manufacturer. You should change this to something that will be obvious to your patrons, like "Public Library Wireless", or something like that. This will be the "sign" that people see when they open their laptops, letting them know your network exists. See the documentation that came with your access point for more information on how to do this.
Even the relatively "dumb" models listed above still have some features standard that we'll need to turn off: namely the built-in DHCP server. DHCP is a way of providing all the information needed to your patrons' laptops. To keep things running smoothly, we'll let our server handle this task. How to disable DHCP on your access point should be in the manual that came with it. It's not hard to do, but access points are all different, so help for this step is beyond the scope of this tutorial.
You'll also need to set the IP address on the access point. Again, how to do this is different for different models, but it's not too hard—you can do it! For this example, we'll set the IP address of the access point to 192.168.1.2. (The third chunk of this IP address—the "1", in this case—can be anything you want, as long as it is different from the existing IP address range of your staff workstations. More information than this is—yep, you guessed it—beyond the scope of this tutorial.)
Finally, make sure that encryption is disabled on your access point. Encryption (WEP, WPA, etc.) is a great idea for home or private business uses, but it sort of defeats the point of the free, public network that we want to set up. We want this to be as easy as possible for our patrons!
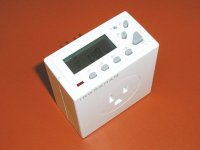
An Electronic Timer
If you are concerned with having a free, open access point on twenty-four hours a day (maybe you don't want people parking outside your library in the middle of the night using your connection), there is a really low-tech solution for you. For about $9.99 at Target or Wal-Mart you can buy a simple electronic timer to plug your access point into that lets you schedule a different on and off time for every day of the week. Of course, you may love the idea of the library being used even when you're not open. If so, don't worry about timers.
By this point, you should have a computer with two network cards, one card connected to your main network, and the other connected to your access point. Your access point should be powered on, have DHCP turned off, the IP address set, and encryption disabled.
Now we're ready to set up the server!
Previous Page: Introduction
Next Page: Installing and Configuring Ubuntu Server