
By John C. Rucker (Page 3 of 10)

Linux for Libraries!
Linux is an obvious choice for libraries and librarians: it's all about Freedom, it's stable and secure, it can do most anything you could ever want, and it often costs nothing. There are dozens of PC operating systems based on Linux that we could choose. You might have even heard of some of them: Red Hat, Fedora, SuSE, Debian, Mandriva, etc. They are all fine operating systems and any of them would work for this project.
Though it's relatively new on the Linux scene, I've chosen Ubuntu because of its ease of use, strong community support, and strong foundation support. If you don't have a high-speed Internet connection to download Ubuntu, they'll even send you a copy for free.
Ubuntu has made waves in the last couple of years by offering a well-polished, easy to use version of Linux aimed at home desktop users. Ubuntu can also make a fine, secure server, however. The server version of Ubuntu is supported up to 5 years, but has no graphical interface by default. In the interest of making this as easy as possible for a public library, we'll use the desktop version and then add the needed server components to it. This desktop version will be supported by Ubuntu for 3 years. We'll be using 8.04 "Hardy Heron", the latest Long-Term Support (LTS) release from Ubuntu. Hardy will be supported—this means updated for security and bugfixes—until 2011. And Ubuntu releases a new LTS version every two years that you can easily upgrade to.
First we need to get the software. As mentioned above, Ubuntu comes in two flavors: regular and server. We want the desktop version. To download it, go to the download page, select "Desktop Edition", whether or not you're running a 64-bit processor (if you don't know, you're probably not), then select a mirror location closest to you. Click "Start Download" and the download will begin. You are downloading an ISO file. If you've not done this before, you should know that you shouldn't just burn the ISO file to a CD. You need to use a program that understands ISO files to burn it. On a Macintosh or Linux PC, this is built-in. On Windows, you'll need to open the ISO file in the software that might have come with your computer or CD burner, like Nero, Easy CD Creator, or use the freely downloadable CDBurnerXP Pro.
Once you have burned the disc, turn your computer on, pop the disc in, then hit the reset button. When the computer restarts, it should boot from the CD, and you should see on the screen that is shown in the screenshot below. If not, you may need to check your BIOS settings to allow your computer to boot from the CD drive.
For the next several steps, we will be looking at some specific tasks to get our filter up and running. For more general information on how to run and customize an Ubuntu system, please see the Ubuntu documentation site.

After your computer boots from the CD, you will see a screen where you need to choose a language. If you want English, just hit the enter key on your keyboard, otherwise use the arrow keys to choose your language.

On the next screen, use the arrow keys to choose the second option, "Install Ubuntu", then hit the enter key. (The first option is fine, the second is just quicker.)

You will now see a progress bar as the installation program loads. Depending on the speed of your system, you may see this screen for a long time.

Finally, you'll end up at the installation screen. Click the "Forward" button to progress through the introduction, time zone, and keyboard layout screens, changing settings to match your situation.

On the "Prepare Disk Space" screen, choose "Guided - use entire disk". Click forward until you come to "Ready to Install", then click "Install".

Enter your desired username, password, and machine name. For this example, I used a user of "dgadmin", and a machine name of "dgserver".

Finish clicking forward through the screens, then click "Install". Depending on the speed of your computer, for the next 10-30 minutes you'll see the installation progress bar tick by.
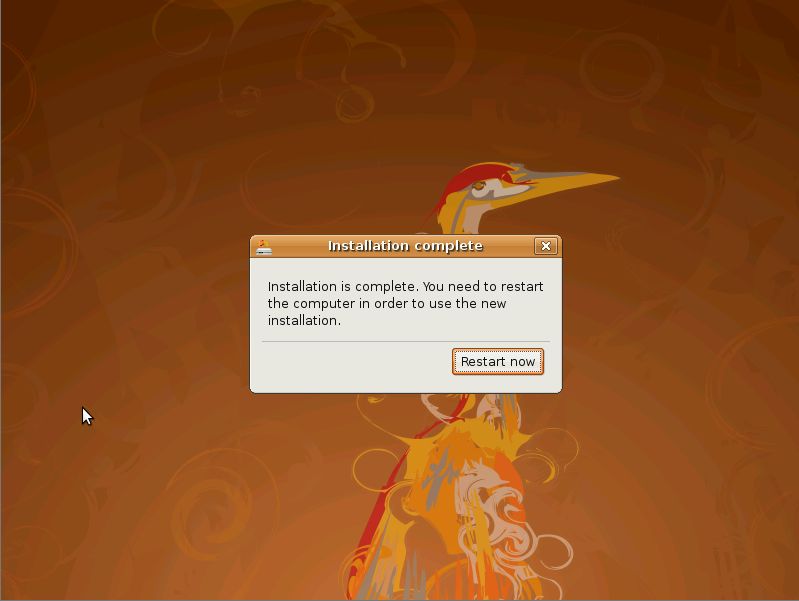
When the installation is finished, you'll need to restart your computer and remove the installation CD from the drive.

When the computer finishes restarting, you'll be at a login prompt. Use the username and password you created earlier to login. The very next thing you should do is run the updater to make sure all the security updates and bugfixes are applied to your machine. Do this by clicking on the red arrow up on the top menu bar. A window will appear showing all the updates waiting. Click on the "Install Updates" button, then wait while everything downloads and installs. When the installation is finished, it's a good idea to restart the computer. Click on the red power button icon on the top right of the screen to restart. Make sure you regularly check to see if there are more updates to run so that your server is always up to date.

After restarting, log back in again. Before we go any further we'll need to manually set the IP addresses for both of the network cards on your computer. On the menu bar at the top of the screen, click System -> Administration -> Network.
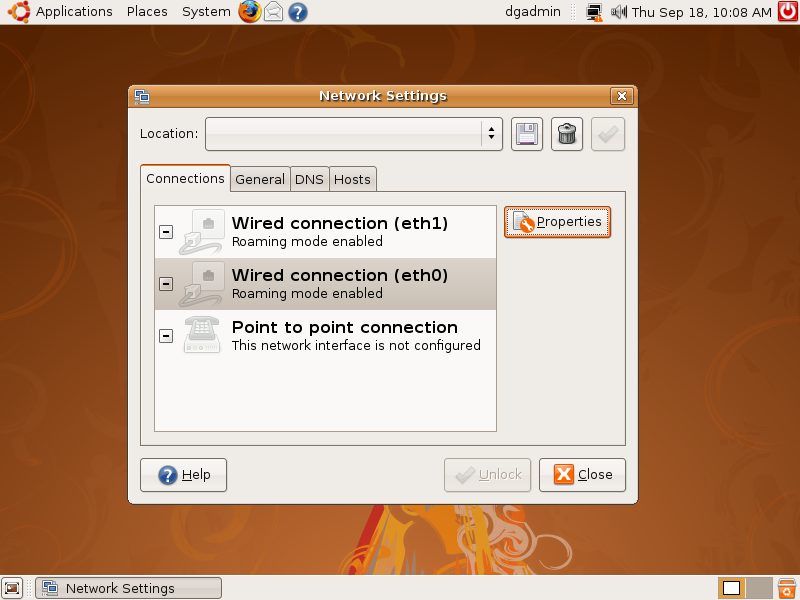
On the "Network Settings" window, you'll have to click the "Unlock" button at the bottom and enter your password before you can actually change anything. Once you do that, you'll see that there are two network cards listed. eth0 is your primary network card, and the cable from your existing network should be plugged into it. eth1 should have a cable going to your wireless access point. If these are reversed, switch them now. Click on eth0 to highlight it, then click "Properties".

In the "eth0 Properties" window, uncheck "Enable roaming mode". Set "Configuration" to be "Static IP Address". In the "IP Address" field, you need to enter an address that will work on your local network. If you're not sure what address range is in use on your network, you can go to a Windows PC on your network, click Start -> Run, and type cmd then hit enter. In the command shell that appears, type ipconfig /all and hit enter. This will show you values for these network parameters you are currently using. Just make sure you use an IP address that is not currently being used on your network, and write it down so you remember it. For this example we'll use an IP address of 192.168.0.2.
Close that window, then repeat the process for the secondary network card, eth1. Uncheck "Enable roaming mode", set "Configuration" to be "Static IP Address". In keeping with our example, we'll use an IP address of 192.168.1.1. Whatever address you use, make sure that the first 3 chunks of numbers (the "192.168.1" here) match the first three chunks of the IP address you gave your wireless access point earlier. We'll use a subnet mask of 255.255.255.0 and the same gateway that you used for eth0.

Back on the "Network Settings" window, click on the "DNS" tab. Click on "Add", then type your DNS server information here. If you don't know it, it would have been displayed by the ipconfig command earlier. You likely have at least two DNS servers, make sure to add them all. Now click on the "Close" button to finish.

So you now have your network cards configured and connected to the right places. Now, we'll start adding software. On the menu bar at the top of the screen, click on System -> Administration -> Synaptic Package Manager. (You'll have to enter your password at this point.) In Synaptic, click the "Search" button then type "dhcp3-server" in the search box and click "Search". On the search results pane, click on the box next to "dhcp3-server" then click on "Mark for Installation".
Repeat the steps above for the following programs. You will then get a message that the system needs to mark additional programs for these installations. Click "Mark" to do this.

When you are finished marking software for installation, click the "Apply" button on the toolbar, then again on the summary window that appears. Several minutes later, depending on the speed of your Internet connection, you'll get a confirmation that your changes were applied. You may close all the open windows.
On the next page we'll start setting up all this software to make a working system. But before we do that, to make our life a little easier we're going to create a special shortcut on the desktop that will launch a text editor with administrator rights. Ubuntu has your account running as a normal user, and to edit the configuration files for the server software we'll need to authenticate as the administrator. Often this is done at the text-only terminal. The shortcut below will be a convenient way to avoid using the terminal.

Right-click anywhere on a blank spot on the desktop. On the context menu that pops up, select "Create Launcher". On the "Create Launcher" window, make the type "Application". In the name field enter gedit (as admin). In the command field, enter gksu gedit. Click "OK" and an icon will appear on the desktop. When you double click this icon, you'll be prompted for your password. After you enter it, the gedit text editor will launch with full rights to edit any configuration file on the system.
Follow the same procedure above to make the following launcher icons that we'll also use later:
sudo /etc/init.d/dhcp3-server restartsudo shorewall restartsudo /etc/init.d/squid restartsudo /etc/init.d/dansguardian restartNext stop, configuration of the above services.
Previous Page: Hardware Configuration
Next Page: Configuring DHCP Server and Shorewall